Wow. Learn Thai Through Stories, Grammar & Exercises – Book 2 (with audio CD) that I illustrated for my lovely client Karine Jones is now official published!
I can’t believe that it has been only 18 months since the last book was published! See my blog about [Learn Thai – Book 1 – by Karine Jones illustrated by Jessica Emmett]. And you can see more book page samples and images from the [Illustration] page.
You can buy the book from the publishers who ships internationally:
http://kaweepublishing.com/learn-thai-book-2/
I have to take a moment of reflection. After the first book was published, I realised that with all my heart that I wanted to do illustration full time! It’s a little strange because I’ve been a practising freelance artist for 9 years (which some of the work has even been illustration jobs)… so on one hand I don’t feel like a new artist… on the other I feel like I am a illustrator as I feel such excitement and full of new hope and possibility about this change in direction for my career!
But I don’t reject every part of my previous work practices. Both the Learn Thai books have utilized not only my illustration skills, but also my basic design ones as I have laid out every page ready for the printers and the CD labels. I even designed the logo. I actually love creating logos an aspect I will miss in design.
Overall it has been an amazing year being able to 100% focus on illustration. Every day I have either been working on illustration commissions or drawing for fun or reading up on techniques or practising drawing/painting both digitally and traditionally…. I think you get the picture =P. Being able to learn every day is both challenging and exciting!
In terms of the Learn Thai book 2, I think it’s safe to say that overall the illustrations improved and it has been joy to work on. One of my favourite images from the books was of of the characters holding an umbrella and another getting soaked. I can not take credit for any of the writing or stories in the book and all has been imaged by Karine. It is more my job to try and get her vision onto the page. After two books we have formed a great collaboration. We both learn a lot every book that is completed! The hardest lesson for me this time was the discovery of a bug when copy & pasting between InDesign and Illustrator… but sorted out now!
When I decided to be an artist as a teen, there were two things I could not predict…. the first having to learning how to run a mini business as a freelancer and do my own taxes (fun times)… second was while I love the technical aspects of digital art, I could never predict just quite how much technical knowledge is needed to be an artist in the modern age! Mastering complex software, printing processes and even basic website coding as a single person has been daunting while fantastically challenging. I definitely try to keep up to date but I think it is some what impossible to learn all the specialist stuff out there, so sometimes it has to be learnt on a need to know basis. This time around a welcomed addition to both Learn Thai books are audio CDs. It was interesting learning about colour separations for the CD labels, a lot more technical than I had ever had to prepare for a print job despite the design being very simple. As t-shirt design is my next personal venture I was determined to learn how to do separations thankful some how it all came together at the end.
If a young creative ever asks me for advice (which does happen from time to time), I always say… “Learn the software!”
The books itself goes beyond just a “children’s” education book. I have actually been surprised that over the past few years I have come across people with a Thai connection and they felt they wanted to try their hand at basic Thai, so this book is as useful for adult learning as well as for children =).
While I to the visuals, my job ends once the book is printed. It is only Karine’s hard work, passion to get these books made and her determination to get them out there is something I’ve always been in amazed by. I thank Karine & Dave B. from CPI for helping my realise last year that illustration was a possibility!


")
")
")
")

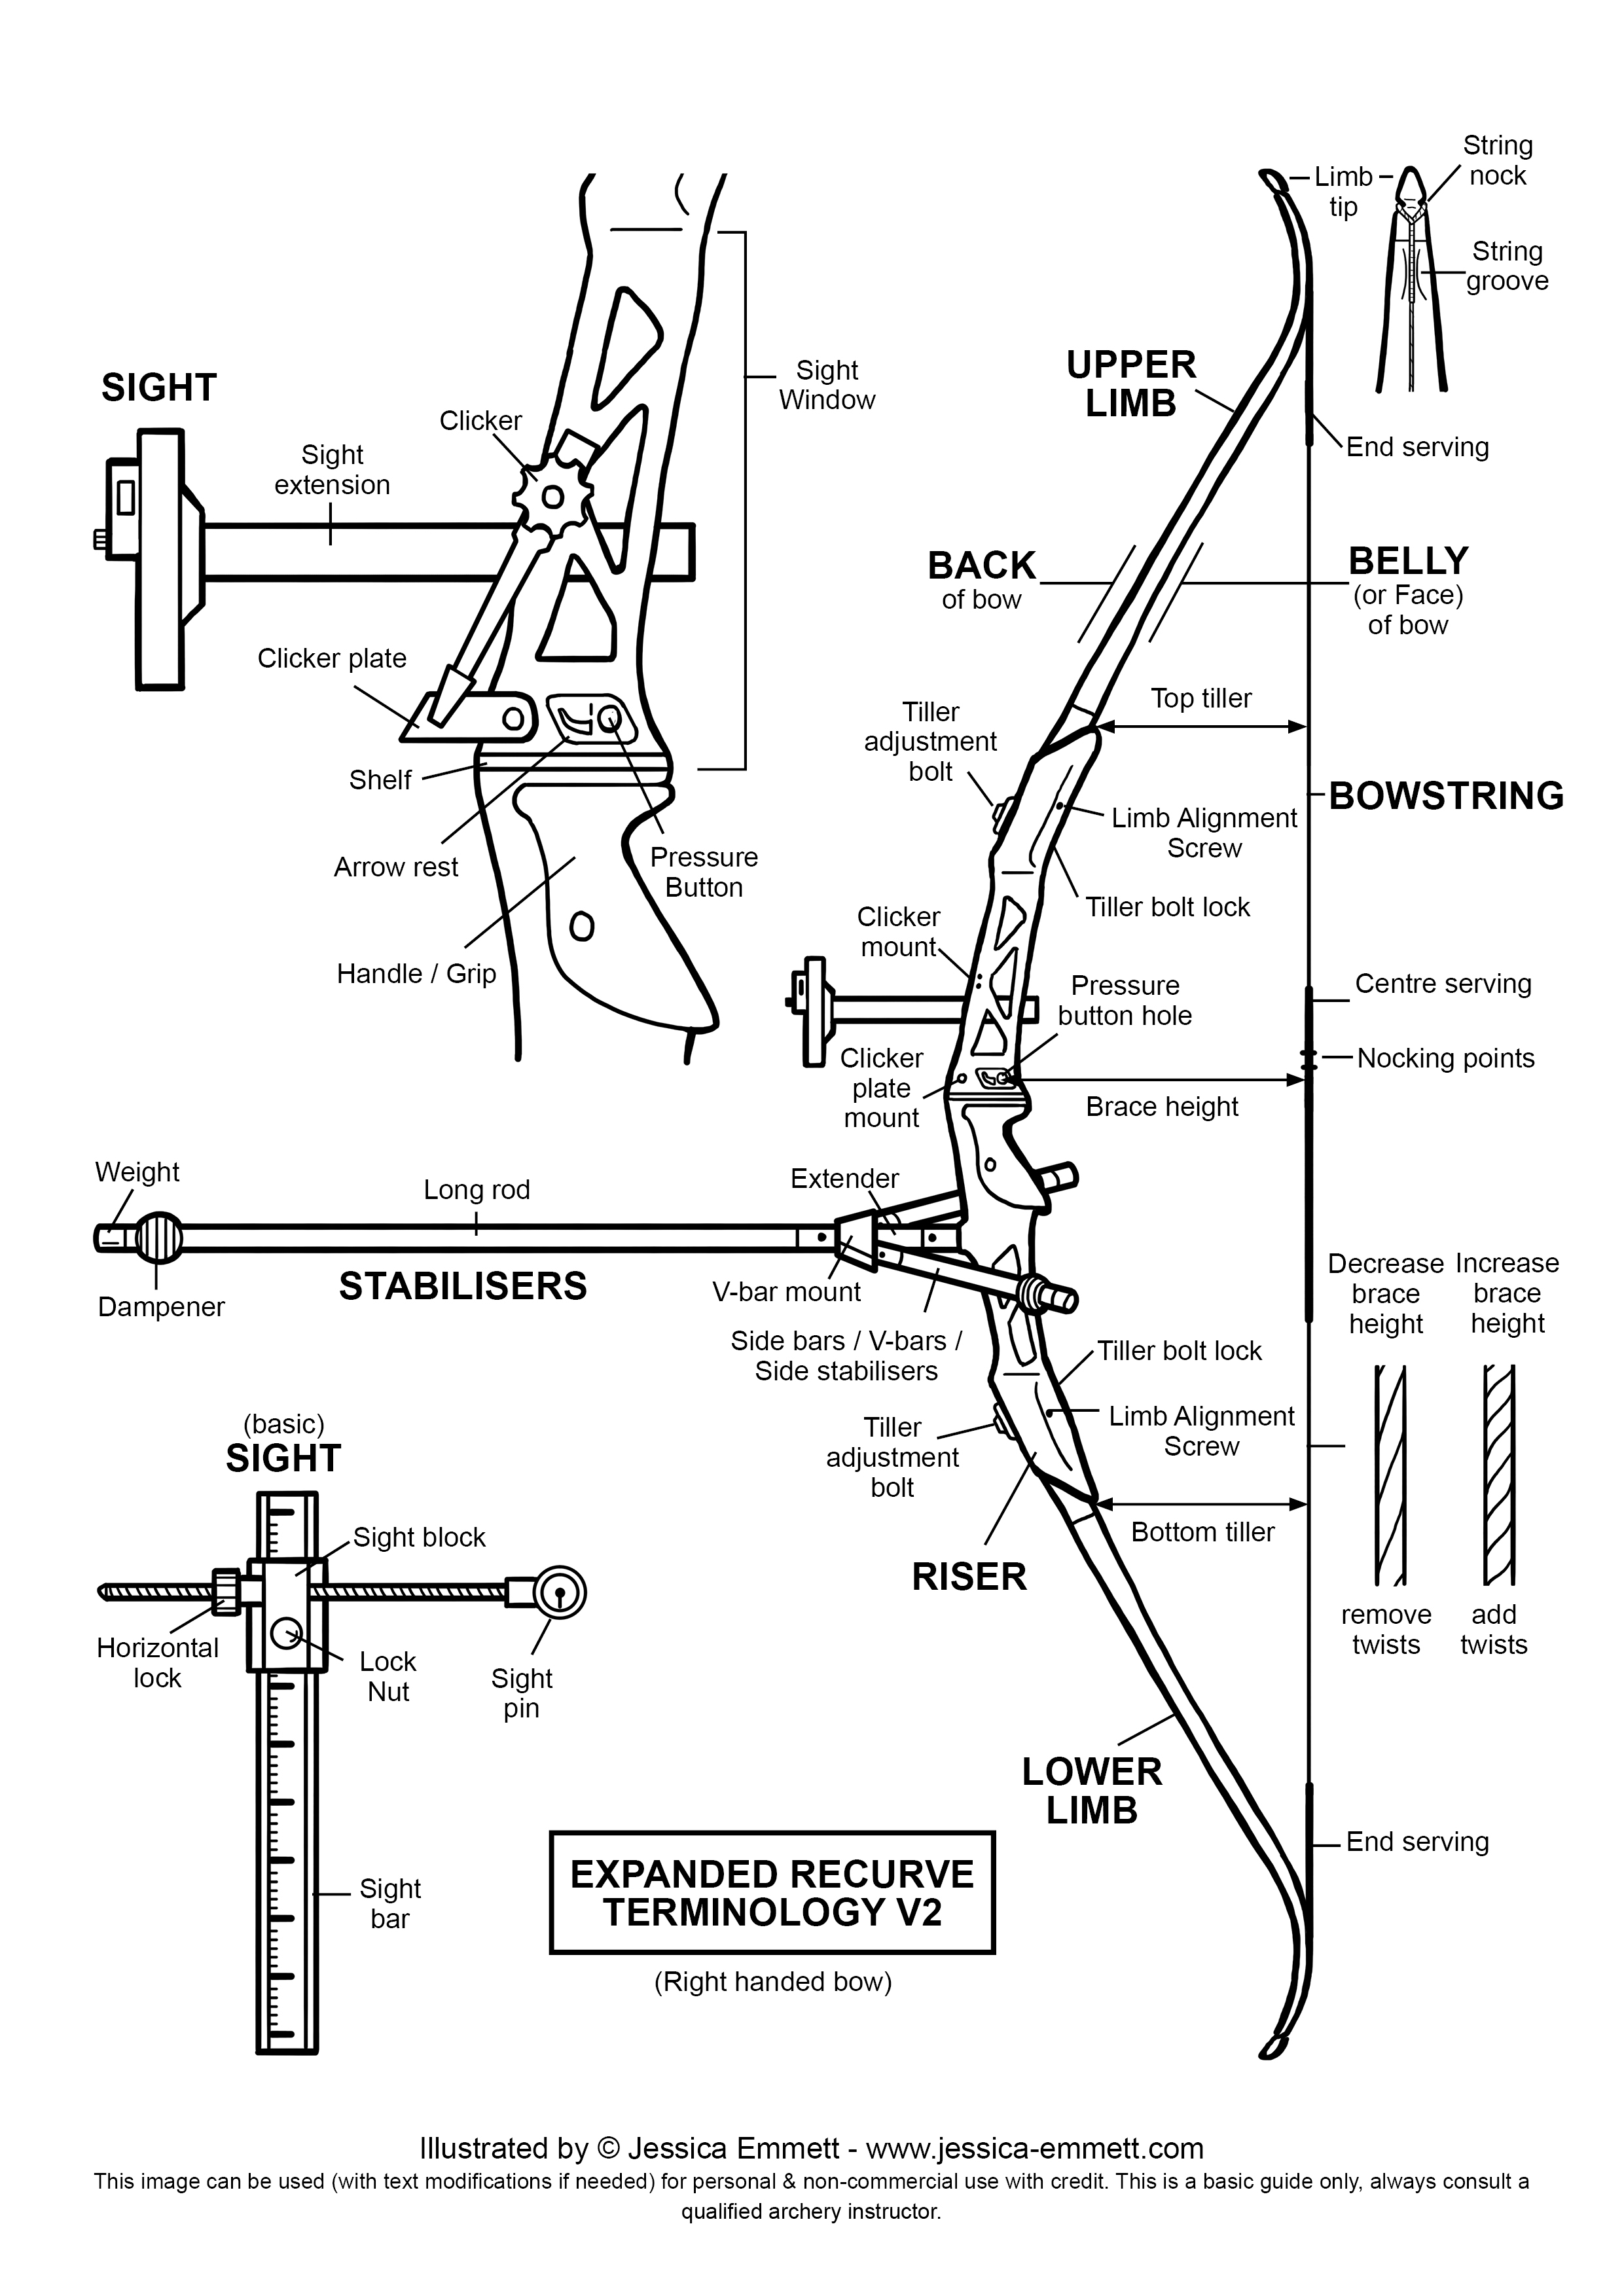
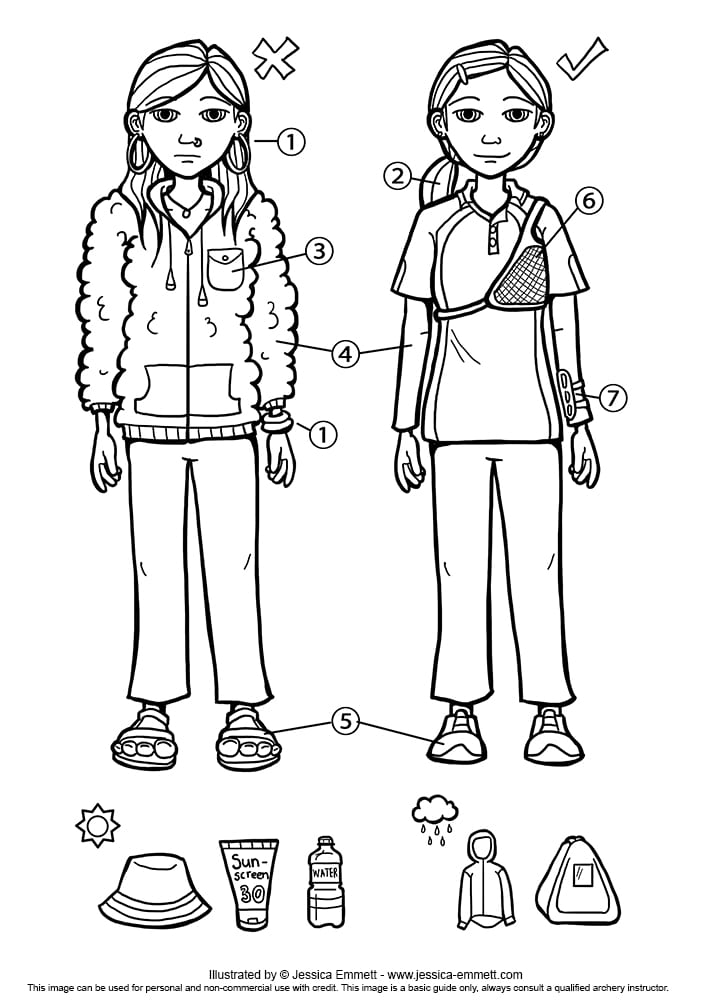
![Print Quality]](https://www.jessica-emmett.com/wp-content/uploads/archery-diagrams-print/archery-safety-clothing.jpg)